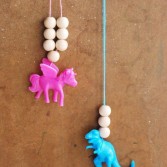
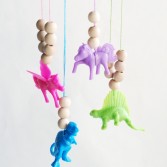
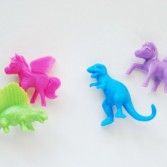
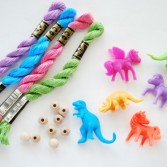
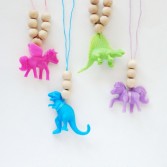
Plastic animals are always fun to play with, but how about wearing one around a kid’s neck in a form of a pretty awesome necklace? You can make a dozen of them easily, they look so whimsy and fun! Here’s what you need for that: small plastic animals, perle cotton embroidery thread, wooden beads, scissors, thumbtack and needle with a large eye. Depending on what animals you have (with bellies, flat-ish backs or with wings or scales) and their position, you may need to get creative while making a necklace or set some aside. Read step-by-step instructions at hellobee.com and enjoy!
Colorful DIY Animal Necklaces To Make
Tue, Feb 10, 2015 | Accessories, DIY Projects
Advertisement |
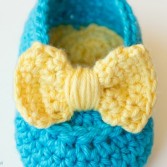
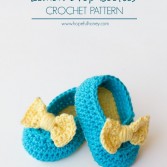
Adorable DIY Crochet Baby Booties To Make
Tue, Feb 10, 2015 | DIY Projects
Is there anything cuter than tot’s feet? They are like little candies, aren’t they? When I see projects with the tiniest booties like these, my heart is just melting, really. They are so darling and pretty! You can easily make them by yourself for your little one or present someone close, who is now expecting or just had a child. For this project you will need 3.50mm crochet hook, 8ply yarn – patons cotton blend, tapestry/yarn needle and scissors. The pattern fit for 0-6 month old tot and the sole length is 9cm. Read proper instructions at hopefulhoney.com and enjoy crocheting! Have fun!

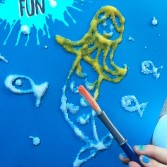
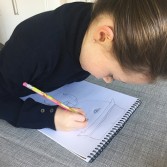
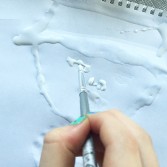
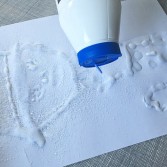
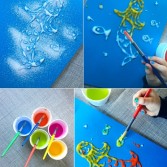
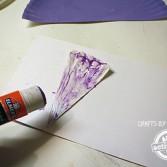
Funny DIY Salt Art For Your Kids
Mon, Feb 9, 2015 | DIY Projects
What a wonderful idea of creating a beautiful picture with your kids! You will need table salt, craft glue, watercolor paint, heavy white and colored paper, paintbrushes or pipettes. Lay your paper on an oilcloth, newspaper or baking tray, to minimize cleanup later. Now your kids should draw a picture (it can be thing, animal or any character). Then go with glue on the picture. Now grab the table salt and sprinkle. Once all the glue will be covered with salt lift up the page and shake off the excess. Now you only need to drop a little color in one spot and it spreads along the salt. The salt crystallizes and sparkles and it’s so good looking!
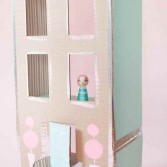
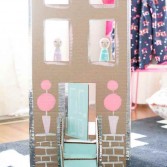
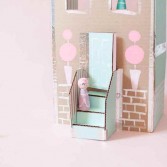
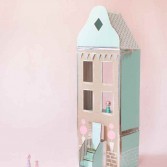
Sweet And Easy DIY Cardboard Dollhouse To Make
Sat, Feb 7, 2015 | DIY Projects
Got some leftover cardboard boxes from Christmas or after moving to another place? Instead of throwing them away, find a good use for them! For example, let’s make this adorable dollhouse for your daughter or niece. There’s even no need to write a comprehensive tutorial, because it’s beyond simple. Gather some scissors, washi tape, silver metallic (or other) duct tape, paints and paint brush. Then all you need to do is to cut out the windows and the door from your cardboard box, individually cut out and make the stairs and the roof, attach them to the dollhouse and then just decorate it the way you like, using colorful paints, whimsy washi tape and whatever else. If you need some inspiration, take a look at the example of such a dollhouse below made by laybabylay.com. Isn’t it neat?
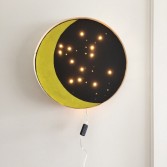
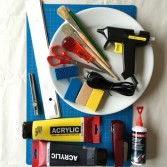
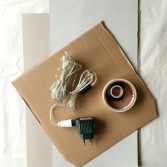
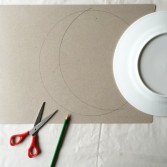
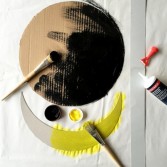
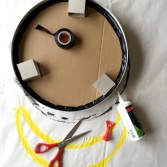
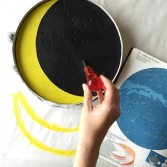
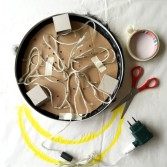
Charming DIY Moon Lamp For A Kids’ Room
Fri, Feb 6, 2015 | DIY Projects
This original lamp will look perfect in a nursery. To make it you will need one piece of cardboard, empty cereal box, LED string lights, large plate (11″ circle), acrylic paint (black, yellow), painters tape, black tape, 4 wooden blocks, craft knife, reamer, scissors, ruler, stapler, craft glue, low heat glue gun and picture of your favorite constellation. Place the plate face down onto the piece of cardboard. Trace the circle and cut it out. Cut out one side of the cereal box. Trace both the full and crescent moon onto the back and cut it out. Cut 1 1/5″ wide strips from the cereal box. Paint the circle black and the moon yellow (don’t use water, just the paint). Let dry, then glue the ends of the two strips together to make a long band. The rest of the tutorial is here.
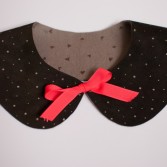
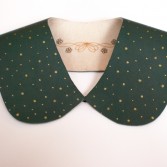
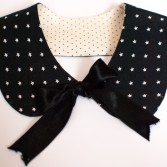
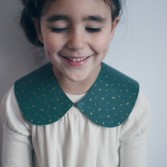
Awesome DIY Reversible Peter Pan Collar
Fri, Feb 6, 2015 | Accessories, DIY Projects
It’s so cute to see how some of the adult fashion trends become popular and suitable for kids, too. The Peter Pan collar is having a major fashion moment, and I love how unconventional and lovely it looks. Wanna make one for your kid? We’ve got an awesome tutorial to share. There’re two benefits of this collar: it’s reversible and there’s no sewing involved. The supplies are felt, suede or leather 35 cm by 25 cm, heat bond 35 cm by 25 cm (the stronger the better), hook and eye or 2 eyelets and 20 cm or more ribbon, general sewing supplies. Download the free pattern for kid’s collar and read the whole tutorial at petitapetitandfamily.com. Enjoy!

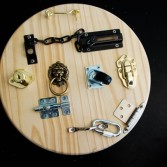
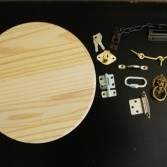
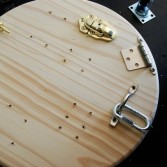
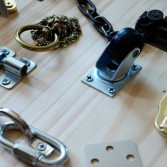
Unusual DIY Toddler Activity Board
Thu, Feb 5, 2015 | DIY Projects
It’s a great idea! This activity board will help your toddlers to capture their attention and develop motor skills. For this project you will need wood, various assorted hardware such as locks, buckles, handles, wheels, drill and screws. If needed, sand and finish your wood first of all. Then determine placement of hardware and mark the screw spots with a pencil. Next pre-drill screw spots. Now screw all of the hardware into place. Now your toddlers have a new toy to play with. This project can be inexpensive depending on the type of hardware you wish to include.
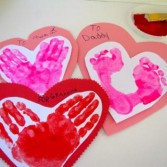
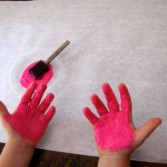
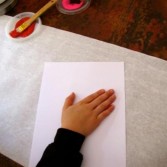
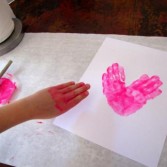
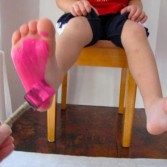
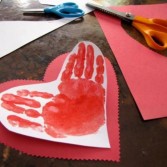
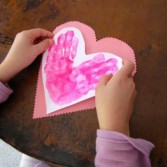
Interesting DIY Handprint And Footprint Valentines
Thu, Feb 5, 2015 | DIY Projects
Looking for a good idea how you and your kids can make original valentines? So here it is! You will need paint, paintbrushes, paper and scissors. The kids paint one hand, then you paint the other. Next they need to press their hand onto the paper. After pressing each hand slightly angle to make the heart shape, they can wipe the excess paint off of their hands. Feet are super fun and tickly to paint. Once the paint will dry, you need to draw a heart shape onto construction paper slightly larger than the hearts your kids made with their hands and feet. Now cut out the hearts on the construction paper. The rest of the tutorial is here.
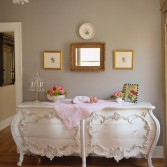
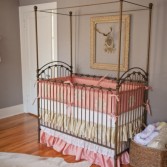
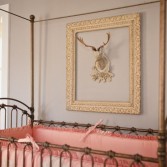
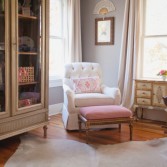
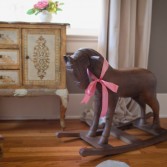
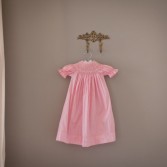
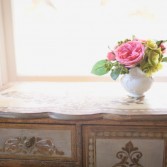
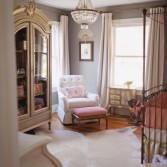
Sophisticated Pink And Grey Vintage Baby Girl Nursery
Wed, Feb 4, 2015 | Kids room
If you’re wondering how to play off vintage style for your tot’s room, today’s photos of a sophisticated vintage nursery for newborn baby girl Lillie Mae would be a great source of inspiration for you. The idea was to create an inviting place for a child, which combines both rustic accents and vintage classics and pink and grey colors. Most of the furniture here from the dresser to the armoire are antique and really make the room. Fresh fabrics help to soften the older furniture and make the whole look of a room a bit softer, more suitable for a baby. All in all, the space seems wonderful for all of the grown-ups to spend time in and for the child, of course. Enjoy the photos!

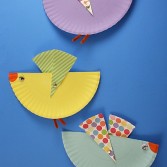
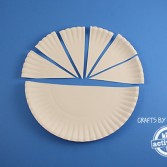
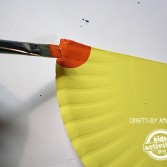
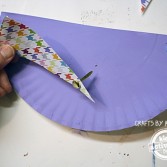
DIY Paper Plate Birds With Movable Wings
Wed, Feb 4, 2015 | DIY Projects
When it’s cold outside, you need to make a funny indoor activity for your kids. So we have an idea: you can make these birds together with your little ones. You will need 2 paper plates, scrapbook paper, craft paint, 3 googly eyes, 1 brown pipe cleaner, 3 paper fasteners, scissors, paintbrush, glue stick and white craft glue. First of all you’ll need to protect your table with newspaper or a plastic table cloth. Two paper plates will make 3 birds. Cut both paper plates in half. Take one of the halves and cut it into six equal pieces. Set the six small pieces aside. Paint the three paper plate halves and set them aside to dry. Place scrapbook paper on the table face down. Next steps of the tutorial are here.
Categories
Archives
- May 2015 (29)
- April 2015 (44)
- March 2015 (42)
- February 2015 (38)
- January 2015 (41)
- December 2014 (31)
- November 2014 (41)
- October 2014 (46)
- September 2014 (41)
- August 2014 (41)
- July 2014 (44)
- June 2014 (38)
- May 2014 (39)
- April 2014 (43)
- March 2014 (39)
- February 2014 (38)
- January 2014 (43)
- December 2013 (37)
- November 2013 (39)
- October 2013 (47)
- September 2013 (38)
- August 2013 (44)
- July 2013 (42)
- June 2013 (38)
- May 2013 (42)
- April 2013 (44)
- March 2013 (42)
- February 2013 (40)
- January 2013 (41)
- December 2012 (31)
- November 2012 (45)
- October 2012 (57)
- September 2012 (39)
- August 2012 (45)
- July 2012 (39)
- June 2012 (8)
- March 2011 (8)
- February 2011 (7)
- October 2010 (8)
- September 2010 (20)
- August 2010 (21)
- July 2010 (6)
- June 2010 (8)
- May 2010 (8)
- April 2010 (24)
- March 2010 (27)
- February 2010 (16)