10 Cool DIY Toy Box Projects
Every kid have a lot of toys. The main problem with that is that you need to organize them. Otherwise your home would become really messy. In order to do that you can use such things as toy shelves or as toy boxes. There are plenty of toy boxes and chests in different stores like IKEA but imagine how happy your kid would be if you make such box by yourself. In order to help you with that I’ve gathered 10 cool DIY tutorials that definitely will provide you with inspiration.
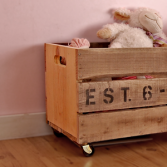
- DIY Vintage Crate Carts As Toys Storage (via ana-white)
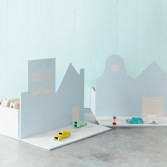
- DIY Toy Chest That Acts As A Toy (via shelterness)
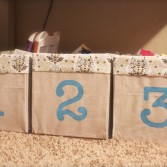
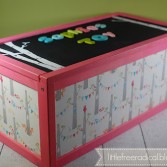
- Numbered DIY Toy Storage Boxes (via thecsiproject)
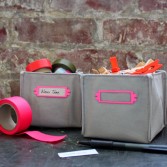
- DIY Sewed Fabric Boxes That Can Be Used To Store Toys (via designsponge)
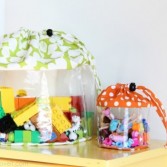
- DIY Transparent Storage Boxes For Kids Toys (via shelterness)
- DIY Lego Toy Box (via curbly)
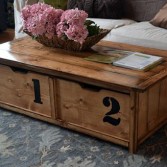
- DIY Coffee Table That Hides A Toy Box (via ana-white)
- DIY IKEA’s Apa Toy Box (via littlefreeradical)
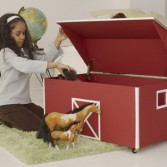
- DIY Toy Chest That Looks Like A Barn (via thisoldhouse)
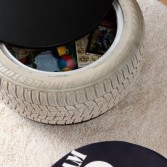
- Recycled DIY Toy Box (via shelterness)
0 Comments For This Post
2 Trackbacks For This Post
March 14th, 2014 at 12:45 am
[…] Materials a sturdy fabric, such as canvas thread to match sewing machine, iron and basic sewing supplies label holders nail polish (optional) 1. Paint the label holders. I couldn’t find label holders in a color I liked, so I decided to customize my own by painting them with neon pink nail polish. It works like a dream! Just as if you’re painting your nails, cover the metal pieces in several coats of polish until you achieve full coverage, then finish with a clear top coat. 2. Cut the fabric. Begin with any size square or rectangle fabric you like. (Mine was 12″ square.) Draw a line of equal distance from each edge; this will determine the height of your sides. (Mine were 3.75″ from each edge). After drawing your lines, the fabric will be divided into a grid of nine sections. Cut away the four corner sections to create a cross shape. Repeat to make a second, identical piece. 3. Sew the fabric. Pin the two pieces together with the right sides of the fabric facing and all of the edges aligned. Using a 1/4″ seam allowance, sew around the perimeter of the cross shape, leaving an opening along the top edge of one of the cross arms. (Detail of the opening left on the top of one of the arms.) 4. Trim the corners. Trim away the excess fabric from the point of each corner as well as from each interior corner. (Removing the excess fabric from the corners will help to achieve neat edges when you turn the piece right-side out.) 5. Turn and press. Turn the whole thing right-side out, carefully working the fabric through the opening left in the stitching. Use a pointy object to poke out each corner. Smooth all the seams flat, then press the piece with a steam iron. Iron under the raw edges of the fabric at the opening so it blends in with the seamed edges. 6. Add top stitching. Top stitch all around the perimeter of the piece. (This will finish the edges as well as close the seam opening.) 7. Sew the corners. Fold the piece so that any two of the arms meet each other. Sew the two edges of the arms together along the top stitching line you made in the previous step. Be sure to backstitch at the beginning and end of this seam to secure it. Repeat this step for all four corners, and you have a box! 8. Attach the label holder. All that’s left is to sew on the label holder with a needle and thread. And start organizing your odds and ends!(source) […]
February 18th, 2015 at 2:21 pm
[…] 6- Cualquier cosa es posible, sólo lo tienes que imaginarlo y ponerte manos a la obra: 1, 2, 3, 4 […]
Leave a Reply