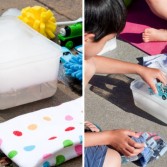
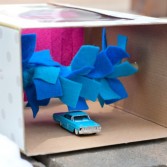
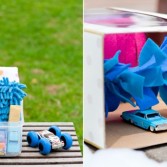
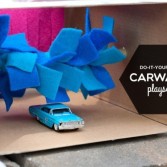
As the weather is so friendly, you should spend more time outdoors with your kid. If you’re looking for an activity that will keep them fun and busy, make this carwash playset. To make it you basically need an old box, some wooden dowels and four sheets of felt. Begin with cutting off both ends of your box to make its both sides open. Then cut out 5” long stripes of felt and tie them around wood dowel. After that push the felt strips close together, so they bunch up. Next cut two parallel holes on each side of the box with a craft knife. Continue the tutorial at hellobee.com.
Cheerful And Cool DIY Carwash Playset For Outdoor Fun
Thu, May 29, 2014 | DIY Projects
Advertisement |
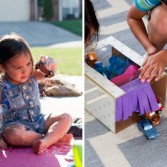
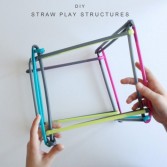
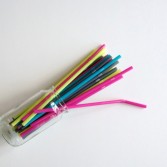
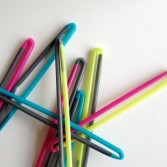
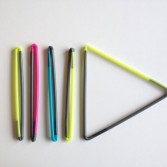
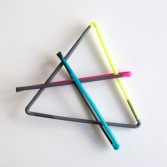
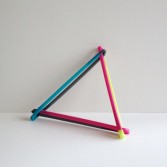
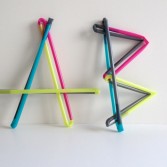
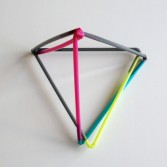
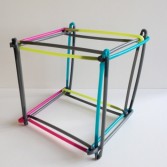
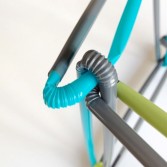
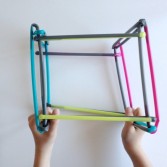
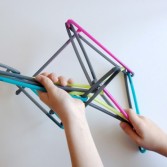
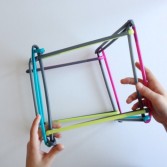
Geometric DIY Construction Toys For Developing Motor Skills
Wed, May 28, 2014 | DIY Projects, Toys
Sometimes kids need toys that will develop them and their motor skills. You will need just flexible plastic straws. Take 2 straws. Squeeze the short end of one straw flat and push it inside the long end of the second straw. Then push the same short end of the second straw inside the long end of the first. You can easily make triangles with 3 straws. You can make simple 2D structures, just put some bows over a triangle. Let the kids try out different angles. You can easily make a mobile with 3 triangles. For simple 3D structures, make a pyramid with 2 triangles and one bow. The rest of the tutorial is here.
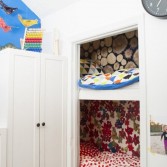
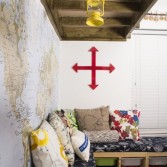
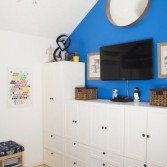
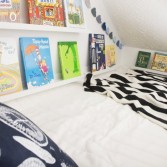
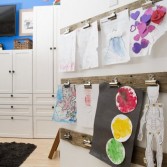
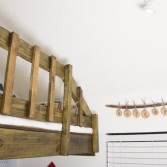
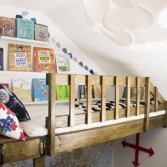
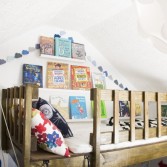
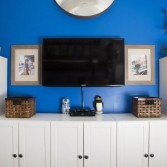
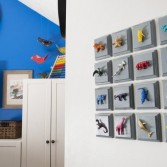
Smart And Cozy Kids Bedroom Design With Limited Space
Tue, May 27, 2014 | Kids room
At first it seems impossible to make a really small space serve so many different functions. However, mom Keight solved this problem with flying colors and designed a bedroom, a playroom, an arts and crafts space all in one for her two beautiful children Judah and Layla. She admits that this task wasn’t easy and she had to really get creative and think smart about proportions. But the result is just fantasic! What I love the most is probably those amazing sleeping nooks – they look so cozy! There’re lots of other interesting ideas, so take a look yourself by taking a peek to the gallery below.

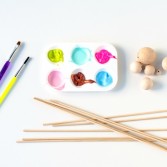
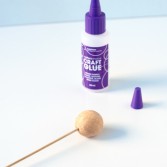
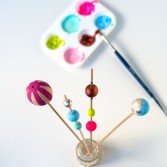
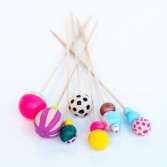
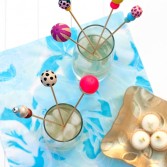
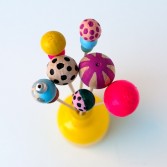
DIY Painted Bead Drink Stirrers For A Kids’ Party
Mon, May 26, 2014 | DIY Projects
If you like to organize various parties for your kids, take a look at this idea! These drink stirrers are fantastic! You will need an acrylic paint, wooden or plastic skewers, paint brushes, palette, wooden beads and glue. Glue the skewer inside the bead. If you’re using a hot glue gun, watch out for the dripping out of the bottom or top of the bead as it can make a kind of ugly mess to paint over. If your beads are all the same size and you’re just having one ball, go ahead and paint your crazy patterns and colors onto each bead. If you have little beads to add in the mix, pop them at intervals along a skewer and paint them there before placing them on the final skewer. You can let your beads dry and glue on the little ones.

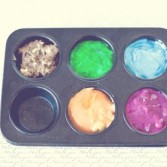
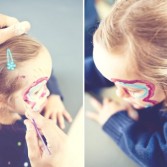
Awesome DIY Natural Face Paint For A Kids’ Party
Sat, May 24, 2014 | DIY Projects
This idea will be cool for any kids’ party! To make the fruit and veggie face paint you will need a tube of natural, non-fluoride toothpaste. For the coloring, first pick out which colors you would like to use, and find fruits and veggies that will produce the colors for you. Grind up the food individually in a blender or food processor. Then heat them in a sauce pan with 1/4 cup of water until boiled down into sauce consistency. Add the sauce slowly to a 1/2 cup of toothpaste and stir until achieving the colors you would like. For the colors shown, use: graham crackers – tan/brown, kale – green, red cabbage – blue, pumpkin pulp – orange and blueberries – purple.

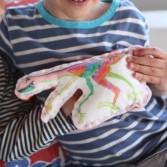
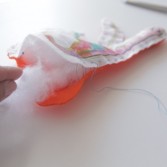
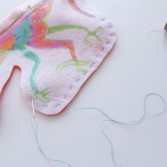
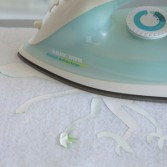
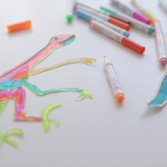
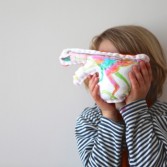
Funny And Original DIY Stuffed Animal To Make With Kids
Fri, May 23, 2014 | DIY Projects, Toys
If your kids like to draw, I bet they’d jump at a chance when you suggest them to make their own stuffed animals. It’s actually easier than it may seem at first, so gather your little ones together and let’s get crafty! The supplies are paper, markers, felt, thread and needle, straight pins, scissors, iron-on printer paper, iron and stuffing. Begin with drawing your character whether it’s an animal, a creature or a monster. Color-photocopy the drawing onto iron-on printer paper and cut out the printed version, leaving no white around the edges. Then place the printout face on the piece of white felt and just follow the instructions on the iron-on printer paper package. Read what to do next at bkids.typepad.com.
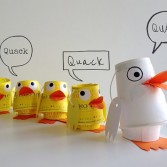
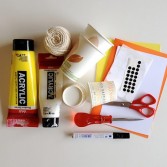
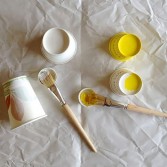
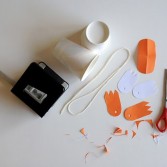
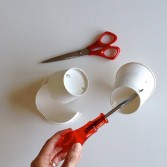
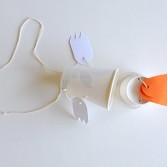
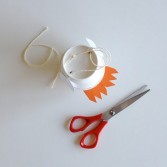
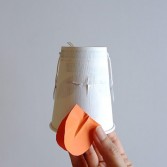
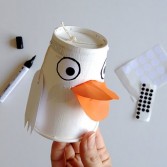
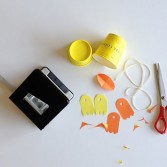
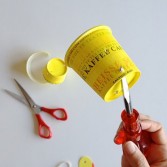
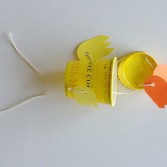
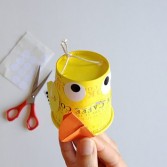
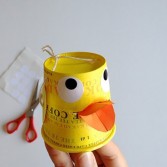
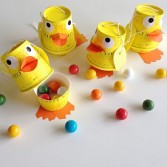
Funny DIY Paper Cup Duck Family Puppets
Fri, May 23, 2014 | DIY Projects
It’s not a simple craft but so cute and fun to make! For these puppets you will need 2 paper cups, 2 small paper cups, orange, yellow and white paper, white and yellow acrylic paint, yarn or baking twine, sticker white and black, 2 brushes, black marker, scissors, craft knife for the beak-cut, reamer/punch, hole punch and 2 bottle caps. For Mother Duck cut a piece for the beak 3 1/2x 1 1/2in (8.5x4cm), fold both ways in half and cut a half circle at both ends. For the feet (orange) and wings (white) cut each two pieces 2 1/2 x 1 1/2 in (3.5×6.5cm). Half circle to one side, 3 triangle cuts to the other side. Punch a hole in each of them. The rest of the tutorial is here.


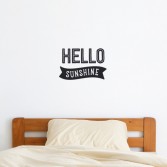
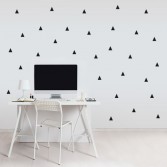
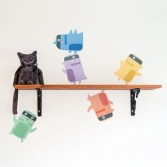
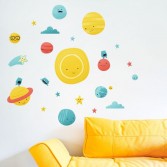
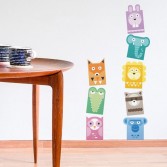
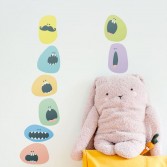
Fancy And Eco-Friendly Wall Decals From Made Of Sundays
Thu, May 22, 2014 | Stickers
The best things about wall decals are that they’re able to lift a room, make it really fun and whimsy and they’re removable. Looking for some fresh options? Take a look at these ones by Made Of Sundays, which are the cutest and so eye-pleasing! This company is based in Finland and creates not only fancy and eye-catchy designs but also eco-friendly. They did a lot of research to find the right materials for the decals which don’t contain PVC or toxic chemicals and chose biodegradable fabric. “Magic” adhesive on the back makes them repositionable without damaging walls. Prices start at €15. Check this out!
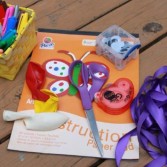
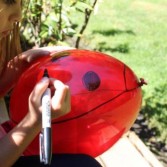
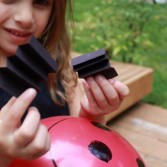
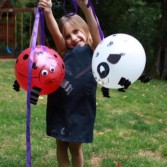
Original DIY Balloon Pets To Make
Thu, May 22, 2014 | DIY Projects
This craft is wonderful idea for party decor or as a new toy. Let’s make it! For this project you will need just balloons, permanent markers, construction paper, googly eyes, ribbon and glue dots. First of all blow up the balloons, and then add on details with a permanent marker. Fold construction paper strips accordion-style to create legs and stick them on with glue dots. At the end use glue dots to add googly eyes and the ribbon leash. You can not only make a puppy and a ladybug as you see on the pics but any other pets you want – just let your imagination work!

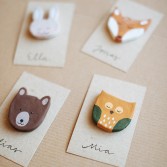
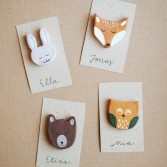
Wonderful DIY Woodland Creature Favors For A Kid’s Party
Wed, May 21, 2014 | DIY Projects
Only looking at these sweetest woodland creature favors makes me want to throw up a forest themed kid’s party. And what about you? They’re really easy to make! The supplies are air drying white clay, clay knife, rolling pin, sand paper, woodland creature templates, acrylic paint, hot glue gun and craft pin backs. To get started roll out clay with a rolling pin to 0.3 – 0.5 inches thick. Then cut your woodland animal templates, lay them onto the rolled out clay and cut around with a knife. With wet fingers you can make their corners smoother. Let them dry overnight, flip over and let dry for another 24h. Read what to do next at ohhappyday.com.
Categories
Archives
- May 2015 (29)
- April 2015 (44)
- March 2015 (42)
- February 2015 (38)
- January 2015 (41)
- December 2014 (31)
- November 2014 (41)
- October 2014 (46)
- September 2014 (41)
- August 2014 (41)
- July 2014 (44)
- June 2014 (38)
- May 2014 (39)
- April 2014 (43)
- March 2014 (39)
- February 2014 (38)
- January 2014 (43)
- December 2013 (37)
- November 2013 (39)
- October 2013 (47)
- September 2013 (38)
- August 2013 (44)
- July 2013 (42)
- June 2013 (38)
- May 2013 (42)
- April 2013 (44)
- March 2013 (42)
- February 2013 (40)
- January 2013 (41)
- December 2012 (31)
- November 2012 (45)
- October 2012 (57)
- September 2012 (39)
- August 2012 (45)
- July 2012 (39)
- June 2012 (8)
- March 2011 (8)
- February 2011 (7)
- October 2010 (8)
- September 2010 (20)
- August 2010 (21)
- July 2010 (6)
- June 2010 (8)
- May 2010 (8)
- April 2010 (24)
- March 2010 (27)
- February 2010 (16)