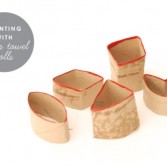
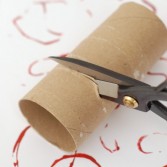
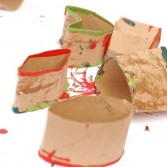
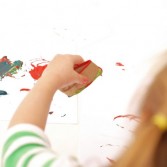
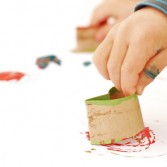
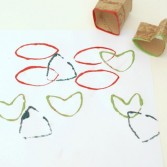
Learn and play! We’ve got a wonderful idea for your kids! For this artwork you will need towel rolls, scissors and paint. You will need to cut the paper rolls into 2 inch chunks. Hand your kids a roll with blunt scissors to try it out while you cut up another one. Decide together which shapes to make, and talk with them about how many sides and corners you will bend through the process. Bend the paper towel rolls into many different shapes. You can use a circle, oval, square, rectangle, diamond and heart. Place a few dabs of paint on a dry paper plate or other trash-able surface. Also you can experiment with colors. Let the kids dip their shapes and stamp the papers in front of them. Your kids can play and paint now!
Creative DIY Artworks With Paper Towel Rolls
Wed, Mar 18, 2015 | DIY Projects
Advertisement |
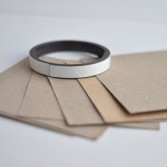
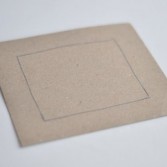
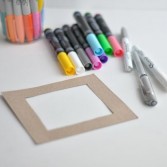
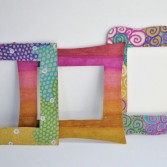
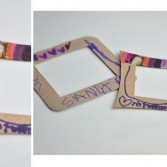
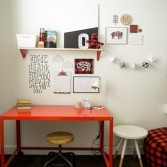
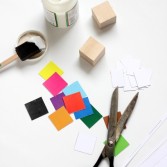
DIY Magnetic Frames For A Kids’ Room
Wed, Mar 18, 2015 | DIY Projects
Do you like to decorate your kids’ room? If your answer is yes, this article will be useful for you! This craft can be fulfilled with kids, they’ll like to create something for their rooms. So for this project you’ll need piece of cardboard, scissors, pencil, magnets, glue, markers or fabric. First of all mark the window frame. Then you need to cut it out and add some color by markers or you can use various fabrics. Now you should attach magnets to frames. Your kids can paint on frames any pictures or titles. It’ll attach great importance to these décor elements!


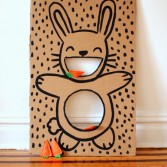
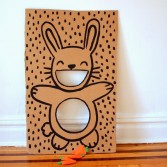
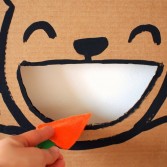
Too Cute DIY Easter Bunny Bean Bag Toss To Make
Tue, Mar 17, 2015 | DIY Projects
Today we continue with good Easter themed activities for kids and share oh-so-adorable DIY bunny bean bag. It’s very simple, so your kids can have fun on their own with just a little help from you. First gather the supplies: cardboard, pain, paint brush, scissors, pencil, pen, eraser, scratch paper, felt, beans (lentils), hot glue and funnel. The tutorial of this bag is incredibly easy: sketch your bunny on a piece of paper, then sketch it onto your cardboard, cut out the mouth and tummy holes and, finally, paint your design onto the cardboard with a pencil marks as guidelines. Head over to pinkstripeysocks.com to read how to make the carrots and finish up. Enjoy!

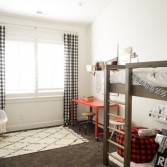
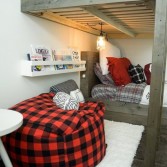
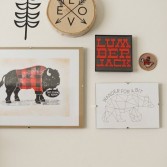
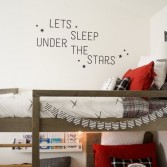
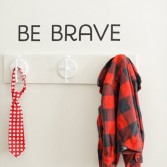
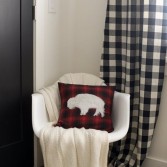
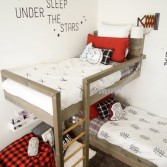
Light And Modern Lumbermen Themed Room For Two Boys
Tue, Mar 17, 2015 | Kids room
Lumberjack chic and plaid theme for a kids’ room certainly isn’t something you see very often in interior designs. It’s actually so lovable! Just take a look at today’s light and modern room for two active boys Oliver and Leo! I’m in love with their bunk bed design, which has a small space for cuddling up with a book before bedtime. Mom Jen not only designed this bed, but also all of the illustrations for the bedding, pillows and wall hangings. Isn’t she just a wonderwoman? She admits that together with her husband they had a great time collaborating on this room. I think that’s why it turned out to be so magical and whimsy. Take a look and get inspired!

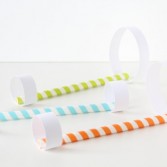
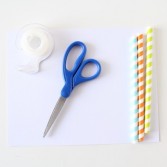
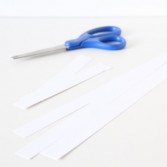
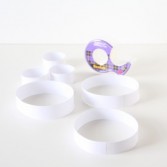
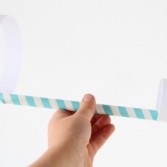
Fun And Easy To Make DIY Straw Paper Airplanes
Mon, Mar 16, 2015 | DIY Projects
We think you’ll be surprised when you see this airplane! It looks very original and funny and it can fly! For this craft you will need legal sized card-stock, straight drinking straws, scissors and tape. First you should cut your piece of card-stock long-ways into strips. You’ll need five strips for three planes. Next, take two of your strips and cut them in half making smaller strips. Then grab your tape and make circles out of the strips of paper. Now tape one small circle at one end of the straw and one larger circle at the other end. Happy crafting!
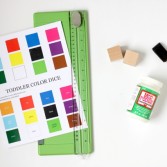
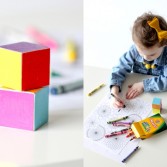
Toddler DIY Coloring Dice For Kids
Sat, Mar 14, 2015 | DIY Projects
The idea of this game is to roll the dice to help your kids choose the next color to use. They roll the dice and then find a crayon that matches and paint. For this project you will need two 1.25″ wood cubes from a craft store, paper cutter or scissors, Mod Podge or craft glue, foam brush and coloring dice printable. First cut out the squares you prefer to use. Mod Podge or glue the squares to the wooden blocks. Also you can brush on a coat of clear Mod Podge on all block surfaces to protect the paper and seal them in place a little bit better. Let them dry and play!


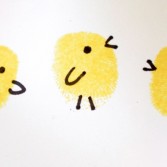
Very Simple DIY Easter Chick And Bunny Fingerprint Art
Fri, Mar 13, 2015 | DIY Projects
Easter is in less than a month, and I think it’s about time to enjoy all the awesome themed crafts with your kids. Today we share a very simple tutorial of some precious Easter cards. They’re really easy-peasy, so you can make dozens of them and use them as decorations or adorable invitations to your family celebration, for example. Invite your tots to come over here and let’s begin! You just need a stamp ink pad or two colors of your choice and a thin point Sharpie marker or pen to create the details. So cute, isn’t it? Enjoy and have fun!


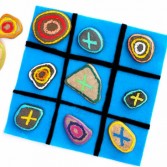
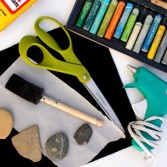
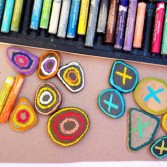
Original DIY Tic-Tac-Toe Game From Stones
Fri, Mar 13, 2015 | DIY Projects
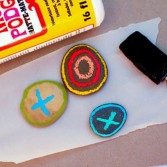
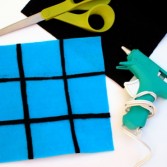
It’s a very cheap and easy-to make DIY, cause all you need is stones. So make this game for your kids now! You will need 12 smooth, flat rocks, oil pastels, Mod Podge, foam brush, parchment paper, felt (two different colors), fabric scissors and hot glue gun. Wash and dry your rocks. Use your oil pastels to decorate your stones with X’s and O’s (or other shapes of your choice). Cover your work area with parchment paper. Use your foam brush to coat the rocks with Mod Podge. To create a Tic Tac Toe board, cut out one felt square. Then cut out and hot glue strips of the other color felt to create your grid. Let’s play!
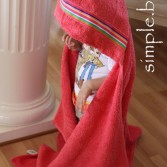
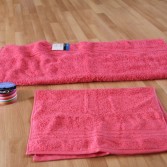
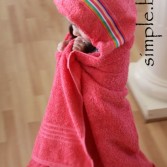
Cute DIY Large Sized Hooded Towel For Your Kid
Thu, Mar 12, 2015 | DIY Projects
Baby hooded towels are the cutest, aren’t they? There is a plenty of them on the market, but once your child grows out of them (so fast, huh?), it seems like there’s no choice but using the regular ones. Gladly, I found the tutorial, which explains simply and quickly how to make a large sized hooded towel. So, if you miss the hood, join us today and let’s make a hooded towel, which is big enough, pretty and cool! Prepare a regular sized towel and a hand towel, matching ribbon or scrap fabric strips to decorate the hood. Take your hand towel and cut it around 24” long, fold it half lengthwise and cut your ribbon the same size as the towel. Continue at onesimplebliss.com. Enjoy!
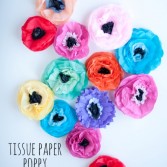
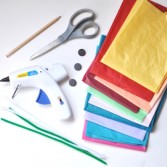
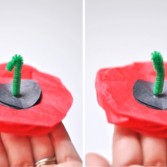
Romantic DIY Tissue Paper Poppy Magnets To Make With Kids
Thu, Mar 12, 2015 | DIY Projects
All kids love flowers! This project will be good for girls and boys. Girls can make these poppy magnets for themselves, boys can create them for their moms or sisters. You will need tissue paper, magnets, pipe cleaners, hot glue, scissors and pencil. Begin by cutting a stack of circles: 1 stack for the flower (any amount you want) and 1 smaller stack (like 5 pieces) for the center. Stack the circles, the smaller ones in the center of the larger ones, and skewer it with the pipe cleaner. Bend over the tip of the pipe cleaner to keep it from slipping out. Pull the pipe cleaner down so the folded tip is snug in the center of the tissue stack. Next steps of the instruction are here.


Categories
Archives
- May 2015 (29)
- April 2015 (44)
- March 2015 (42)
- February 2015 (38)
- January 2015 (41)
- December 2014 (31)
- November 2014 (41)
- October 2014 (46)
- September 2014 (41)
- August 2014 (41)
- July 2014 (44)
- June 2014 (38)
- May 2014 (39)
- April 2014 (43)
- March 2014 (39)
- February 2014 (38)
- January 2014 (43)
- December 2013 (37)
- November 2013 (39)
- October 2013 (47)
- September 2013 (38)
- August 2013 (44)
- July 2013 (42)
- June 2013 (38)
- May 2013 (42)
- April 2013 (44)
- March 2013 (42)
- February 2013 (40)
- January 2013 (41)
- December 2012 (31)
- November 2012 (45)
- October 2012 (57)
- September 2012 (39)
- August 2012 (45)
- July 2012 (39)
- June 2012 (8)
- March 2011 (8)
- February 2011 (7)
- October 2010 (8)
- September 2010 (20)
- August 2010 (21)
- July 2010 (6)
- June 2010 (8)
- May 2010 (8)
- April 2010 (24)
- March 2010 (27)
- February 2010 (16)