If you never know what you can give to the guests of your kid’s party as presents, this idea is for you! You can make these small gifts with candies or fruits. It always looks very colorful and tasty. You will need thank you pdf, scissors, clear bags, stapler, filler, foam core, fabric, hot glue gun and clothes pins. If you’re making the display board cover your piece of foam core with fabric, pulling tight around the back. Secure to the back with tape. Hot glue clothes pins on, far enough apart to accommodate the bags. Print the pdf and trim down to the fit your bags. Fill bags with candy, fold over the top, and attach paper topper with staples. Clip to display board.
DIY Colorful Favor Bag Toppers For Kids’ Party
Wed, Feb 19, 2014 | DIY Projects


Advertisement |
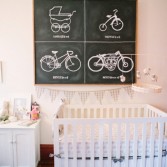
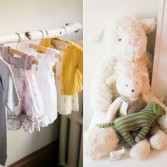
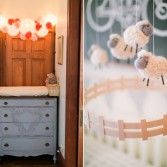
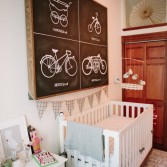
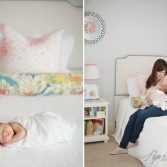
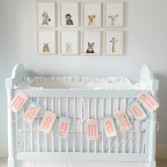
Neutral And Calm Yet Whimsy Baby Girl Nursery Design
Tue, Feb 18, 2014 | Kids room
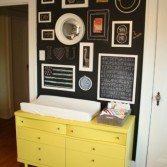
Today we have such a sweet and charming nursery design to share! The very first thing that I’ve noticed was this lovely sheep mobile above the crib, and that’s probably was the moment when I fell in love with this room. It’s incredibly cute, filled with light, so cozy and stylish! I love how they solved the small space problem and hung the baby’s clothes on a bench instead of wasting a lot of place on a closet, made their cabinet with a changing table sort of built-in. Despite the neutral and calm tones and lack of any bright colors, the room looks really cool thanks to the whimsy art, toys and garlands. Take a closer look!


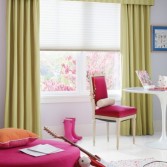
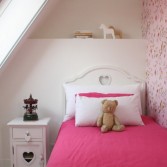
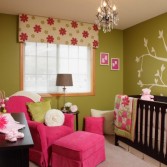
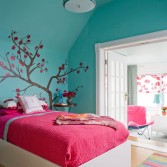
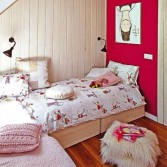
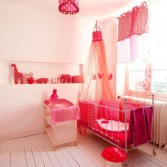
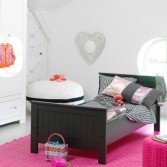
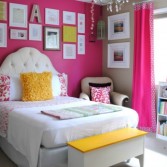
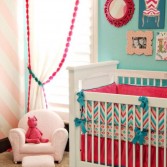
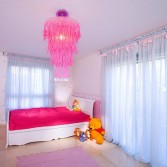
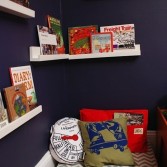
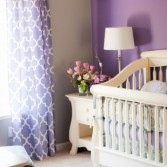
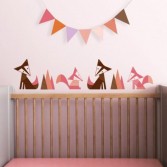
18 Amazing Ways Of Using Vibrant Fuchsia In A Kids Room
Tue, Feb 18, 2014 | Kids room
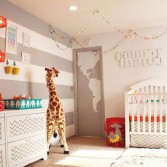
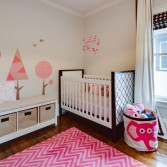
I’ve noticed that a lot of parents have been going for a neutral color scheme in kid’s room design lately. Well, of course, it’s convenient and gender-neutral, and with such a calm canvas you can play with the details the way you want. Fuchsia color is like a fellow for radiant orchid – the color of the year, so it’s also going to be popular. Adding such a vibrant, expressive, captivating and refreshing color to a kid’s room might be your best choice! It fights boredom and lights up an entire room. Plus it has a really good compatibility: fuchsia and neutral can make just a perfect balanced combo, fuchsia and teal or turquoise can look incredibly bright and joyful, etc. Take a look at the gallery below for more combo ideas and inspiration!


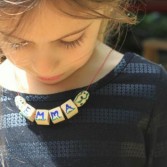
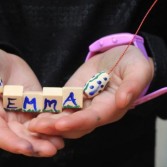
Awesome DIY Name Necklace
Mon, Feb 17, 2014 | DIY Projects
The kids write their names on everything! So this necklace will be very useful for them. Let’s make it! You will need wooden beads, twine or string, acrylic paint and paint brush. You can make it by your hands or make with your kids. They can choose any color of paint to create this fun necklace. Now write kids’ names on beads with a paint brush – one letter is on one bead. Then string beads on twine and voila! Your necklace is ready! If you make birthday party for your kid you can create these necklaces for the little guests. They will be so happy!


Sweet And Easy DIY Toy Cardboard Chair For A Kids Room
Sat, Feb 15, 2014 | DIY Projects, Kids room
I found a really great reuse of cardboard idea for you! So, if you’ve got some of useless cardboard left, let’s make this cute toy chair for your kid’s room. You’ll need cardboard (medium-sized), x-acto knife, metal ruler, pencil, hot glue gun and a chair template. First you need to download the template from the source, cut it out and trace onto a cardboard (you’ll need 4 armchair pieces). Glue two armchair pieces together to get the double-layered armchair pieces. Then cut out seat and backrest pieces so the cardboard flutes are perpendicular when you glue the pieces together. Continue reading the tutorial on hellobee.com.


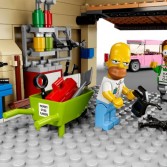
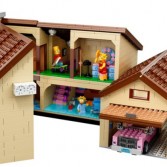
The Simpsons Family Kit By Lego
Fri, Feb 14, 2014 | Toys
Do you know this family? And do your kids know them? Of course, yes, because the Simpsons is the most popular cartoon family in the world! Now they are closer than ever, you with your kids can play with them, build their house and create new stories with them. You will ask us how. We’ll give you a very simple answer – you can get a Lego version of the Simpsons. This project between Twentieth Century Fox and Lego is way to celebrate their twenty-fifth year on our screens. Your kids will be so happy to play, especially those kids who love both projects – the TV show and a Lego. Also it will be perfect gift for your kids!


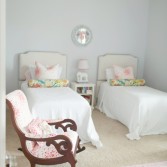
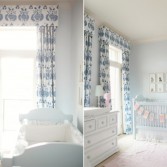
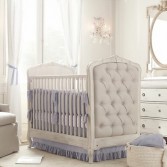
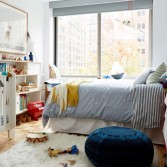
Sweetest Powder Blue, Pink And White Baby Girl Nursery
Fri, Feb 14, 2014 | Kids room
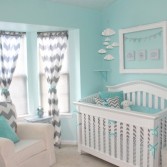
I’ve got photos of the sweetest baby girl nursery to share with you, so if you’re seeking for some inspiration, come on in! First of all I want to say about the color scheme – such a charming, lovely and calm combination of powder blue, white and girly pink. It’s just awesome! Quirky animals wall art and bright pillows on two gorgeous twin beds, colorful name garland on the crib make the whole look of a room more fun and whimsy. But my favorite part of the nursery probably is curtains, they really caught my attention in the first place. They’re kind of in grown-up style, but still perfectly fit the room. What do you like about this room?
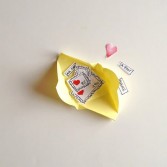
DIY Cute Stationery For Valentine’s Day
Thu, Feb 13, 2014 | DIY Projects
You can make for your kids your own handmade stationery for Valentine’s Day. For making stamps you will need copy paper A4, pencils with rubber erasers, lint roller, baker’s twine, ink pads: red, orange, blue and green, bottle caps and craft foam for the heart-shaped stamps and heart-shaped stamp pen. Ink the pencil erasers and make dots all over the paper. Use at least two different colors. Let it dry. To make the stamps, use bottle caps and craft foam. Instead of cutting tree shapes, make hearts. It’s best to plan on making these the day before, so that the glue has time to dry. Ink the heart-shaped stamps with red and orange ink and press all over a piece of paper. The rest of the tutorial is here.


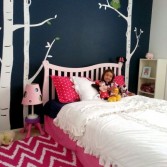
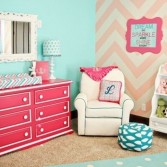
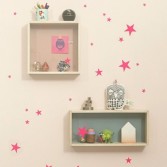
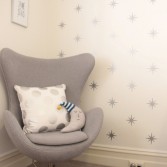
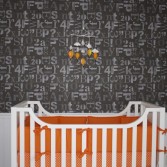
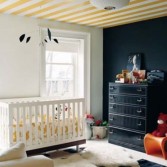
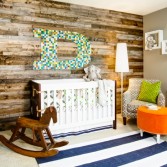
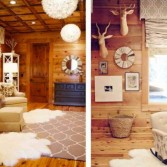
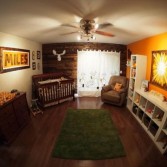
10 Hot 2014 Trends For Baby Room Designs
Thu, Feb 13, 2014 | Kids room
Every industry that is somehow connected to fashion and design every year pics out the trends. So, it’s time to figure out what’s hot for the year ahead for nursery design. Here’re ten 2014 trends for us to remember:
- Navy is the new neutral. This color is getting popular this year and giving grey a run for its money.
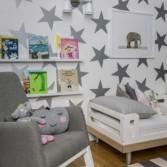
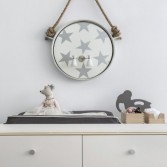
- Stars everywhere. We’ve shared already some rooms with stars print on the walls here on our site, and it seems like this trend is getting a huge success this year.
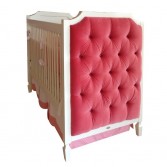
- Unique cribs. Parents are more and more seeking for non-traditional cribs to buy from tufted to embellished with moldings or rhinestones. So, unusual cribs are taking a center stage this year.
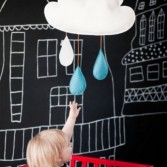
- Black over white. More parents are showcasing their creativity and daring to be bold with dark sophistication.
- Old world charm. Along with modern nursery design twists, there’s always a place for the classic nursery comeback.
- Chevron going strong. It’s still the most popular print in nurseries and we’re okay with that!
- Ways to share. It’s all about making what you have work for you in the most creative and multi-purposed ways possible.
- Preference for purple. Since radiant orchid is officially announced the color of the year, many parents will give preference to all of the purple shades instead of pinks.
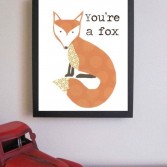
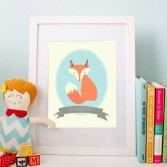
- What does the fox say? It seems like the nursery owl is dethroned and everyone is into foxes right now.
- Cabin fever. We’re gonna see a lot of pallet walls, rustic wood finishes, warm plaids this year.


Funny DIY Original Animal Can Planters
Wed, Feb 12, 2014 | DIY Projects
Your kids should know how to take care of plants or animals. So they will learn how to grow plants with this craft. You and your kids can create different animals and bugs from tuna cans. You will need tuna can, fabric, malleable wire, pliers, awl, scissors, pencil, hot glue gun, pins, paint, needle and thread, beads, pom-poms, etc. First of all you need to prepare the can. Smooth the cut edge of the tuna can using pliers. Make several holes in the bottom of the tuna can with an awl. Gently fold the wire, creating a loop at one end. Coil and tuck the excess wire. Use the tuna can to get the measurements for where to bend the part of the wire that sits in the can. Bend the wire at the end of the wing to make sharp angles. Create a new loop for the other wing. Coil and tuck the wire. The rest of the tutorial is here.


Categories
Archives
- May 2015 (29)
- April 2015 (44)
- March 2015 (42)
- February 2015 (38)
- January 2015 (41)
- December 2014 (31)
- November 2014 (41)
- October 2014 (46)
- September 2014 (41)
- August 2014 (41)
- July 2014 (44)
- June 2014 (38)
- May 2014 (39)
- April 2014 (43)
- March 2014 (39)
- February 2014 (38)
- January 2014 (43)
- December 2013 (37)
- November 2013 (39)
- October 2013 (47)
- September 2013 (38)
- August 2013 (44)
- July 2013 (42)
- June 2013 (38)
- May 2013 (42)
- April 2013 (44)
- March 2013 (42)
- February 2013 (40)
- January 2013 (41)
- December 2012 (31)
- November 2012 (45)
- October 2012 (57)
- September 2012 (39)
- August 2012 (45)
- July 2012 (39)
- June 2012 (8)
- March 2011 (8)
- February 2011 (7)
- October 2010 (8)
- September 2010 (20)
- August 2010 (21)
- July 2010 (6)
- June 2010 (8)
- May 2010 (8)
- April 2010 (24)
- March 2010 (27)
- February 2010 (16)