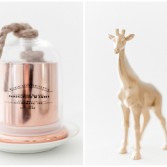
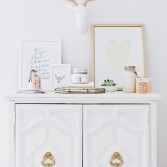
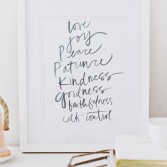
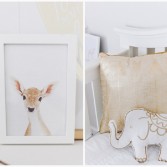
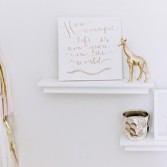
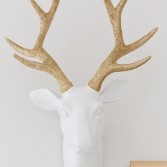
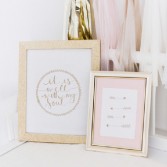
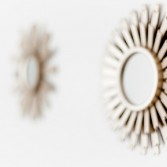
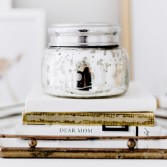
I’m so glad to see more and more gold and white kids’ rooms designs popping up lately. Once I already told you that this is one of the most beautiful, glamorous and lovely combinations ever, and I’m still holding this view. Just take a look at today’s adorable space created and photographed by Leilani of Elsy Photography. Isn’t it neat? I’m crazy about all the art pieces and gorgeous color scheme using my favorite gold and white colors together with soft peachy blush tones. Everything combines perfectly together and creates an impossibly chic atmosphere with a very joyful and feminine vibe. Go down to the gallery below to see all of the stunning pictures and get inspired!
Glamorous Gold, Blush And White Baby Girl Nursery Design
Wed, Feb 18, 2015 | Kids room


Advertisement |
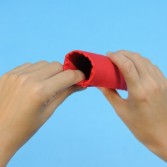
Fantastic DIY Kids Superhero Cape
Wed, Feb 18, 2015 | DIY Projects
Every kid likes to play superheroes. So make this cape for your children and they will be happy! You will need two colors of fleece fabric, t-shirt tailor chalk or pen, scissors, iron-on Velcro, hem tape, letter stencil, acrylic paint, small paint brush, fabric glue, iron and iron board piece of yarn. Choose which color of fleece you want for the cape and cut it so it measures 28” long by 22” wide. Take one of your child’s t-shirts and place it on top of the fleece. Fold the collar down and trace the contour to the fleece. Trace the shoulders too and add one or two inches of length to each one. The rest of the tutorial is here.


DIY Domino Cookies – A Great Counting Activity For Kids
Tue, Feb 17, 2015 | DIY Projects, Food
I love activities that are not only fun but also really cognitive and useful for kids. Today’s craft with domino cookies is so creative and motivating for children! When they’re involved in the cooking process, they get to learn so many things: social interaction, counting, following directions, coordination and so much more. To make the domino cookies for play you only need 300g softened butter, 1 cup icing sugar, 3 cups plain flour, baking paper, knife, ruler, rolling pin and some mini M&Ms. Begin with mixing butter and icing sugar. Then add flour and mix well. Knead cookie dough on top of baking paper until smooth and add extra flour if too sticky. Continue at learning4kids.net and compete the tutorial.


DIY Cardboard Playhouse With A Fold-Up Terrace
Tue, Feb 17, 2015 | DIY Projects
Do your kids love to play with toys or puppets? Maybe they like to create realistic houses or furniture for toys? So today we offer you to make this adorable cardboard playhouse with a terrace with your kids. You don’t need too many details for creating cause this craft is so simple! For this project you will need just corrugated cardboard, a craft knife, paint, markers, pencils, a hole punch and some twine. Cut the cardboard into basic building shapes, and punch holes on the sides to join them into a terrace. Now your kids can paint and decorate their houses. Also you can create alternative designs on the back and front of the cardboard for two alternative play scenes. Then just loop the houses together with twine and start to play!


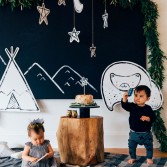
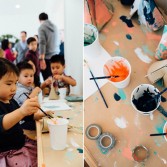
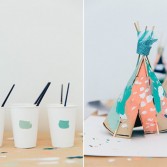
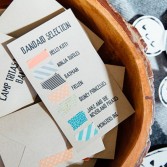
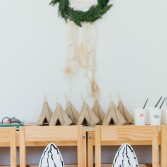
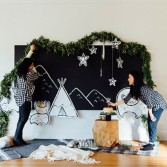
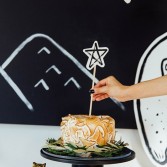
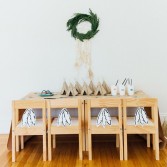
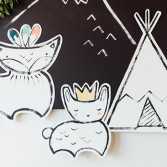
Adorable Modern Camp Themed Birthday Party For Twins
Mon, Feb 16, 2015 | Party theme
I love today’s camp themed kids’ party a lot! It’s fun, cute and so amazing! Super mama Gloria Wong in such a short time planned it all, that it makes us want to give her a huge hug and express our admiration. In the predawn hours she planned and painted these impossibly adorable and whimsical woodland animals and made other preparations for this day. Her love for the kiddos shines through every little detail and it seems like it was even better in real life than it’s shown at the photos. Take a closer look at all of the aspects of this amazing twins birthday party and get inspired for organization of something like that on your own.


Cute DIY Paper Flower Mobile For A Nursery
Sat, Feb 14, 2015 | DIY Projects
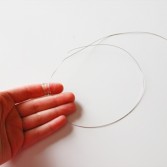
For spring inspiration we offer you to create this paper flower mobile for your kids’ room. You will get a beautiful décor element! You will need brown cloth wrapped fabric stems, brown floral tape, wire cutters and some 22 gauge wire, some coordinated scrapbook paper for flowers, a green paper for the leaves and a floral paper punch. Begin building the frame of your mobile by twisting together two lengths of your cloth fabric stems. Add two more lengths a little further down from stems 1 and 2 (look at pics). Keep building, adding additional stems as you move your way down. Keep working until you have a form that looks like a loose letter C. Once you have the basic shape well established, cut a few floral stems in half and go back and add shorter stems onto your piece. The rest of the tutorial is here.


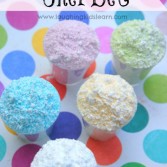
Sugary Sweet And Colorful DIY Sherbet To Make With Kids
Fri, Feb 13, 2015 | DIY Projects
Kids are curious and usually love science projects that seem like pure magic to them. What is more, science projects for kids are really the best, because except that they’re exciting and fun, they can develop some skills, be cognitive. For example, today’s sherbet project provides a sensation for kids to enjoy. To make this light and sugary powder you’ll need soft icing sugar, citric acid for baking and jelly crystals (optional). The recipe is really easy for children to make, but under active adult supervision. Head over to laughingkidslearn.com to find out how to make sherbet and enjoy!


Sweet DIY Candy Corn Barrettes
Thu, Feb 12, 2015 | DIY Projects
Do you like candy corns? We are sure that yes! Everybody loves them! So let’s make candy corn barrettes for your daughter. You’ll need 1 small piece each of orange, yellow and white felt, barrette clips, hot glue gun, scissors and pen or pencil. Gather your materials and heat up your glue gun. Take a barrette clip and trace a candy corn shape around to cover the clip. Cut out candy corn shape. Trace your cut out candy corn to make an exact replica. Trace top portion only of orange felt piece on top of white felt to create top portion of candy corn. Make two. Now trace bottom portion of orange felt piece to yellow felt, to create bottom yellow portion. The next steps of the instruction you can find here.


Easy DIY Yarn Wrap Sheep To Make With Kids
Wed, Feb 11, 2015 | DIY Projects
Lack of ideas how to entertain your tots? Make this awesome sheep in ode to the Chinese year of the Sheep! It’s a cute activity for kids, which they can handle on their own easily, while you’ll have some time for yourself. You just need to help with a little preparations. Here’s the list of supplies: paper plates, thick white wool yarn, googly eyes, low temperature hot glue gun, marker scissors. Begin with cutting notches from the rim of a paper plate and tying wool yarn around the plate. Wrap the yarn in different directions around the plate and through the various notches. Read the next steps of the tutorial at theimaginationtree.com.


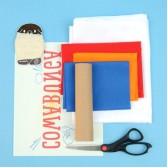
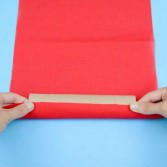
Entertaining DIY Ninja Pillow Fight Party
Wed, Feb 11, 2015 | DIY Projects
If you prepare party for your kids and their friends, pay attention to this idea! You can make ninja pillow fight party and your kids will like it for sure. You will need white cotton pillowcases, custom inkjet iron-on fabric transfers, Ninja Pillow Fight Iron-On printable, inkjet printer, iron, red, orange, blue fabric, white string, scissors, cardboard tube and soft, fluffy pillows. Download and print the Ninja Pillow Fight Iron-On printable on your iron-on fabric transfer sheets. Cut the designs out and use your iron to apply them to the pillowcase. Take the cardboard tube from a paper towel roll and cut it into 7-inch pieces. Using a strip of fabric about 12” x 18”, place the cardboard tube along the short side of the fabric and roll it up. The rest of the tutorial is here.


Categories
Archives
- May 2015 (29)
- April 2015 (44)
- March 2015 (42)
- February 2015 (38)
- January 2015 (41)
- December 2014 (31)
- November 2014 (41)
- October 2014 (46)
- September 2014 (41)
- August 2014 (41)
- July 2014 (44)
- June 2014 (38)
- May 2014 (39)
- April 2014 (43)
- March 2014 (39)
- February 2014 (38)
- January 2014 (43)
- December 2013 (37)
- November 2013 (39)
- October 2013 (47)
- September 2013 (38)
- August 2013 (44)
- July 2013 (42)
- June 2013 (38)
- May 2013 (42)
- April 2013 (44)
- March 2013 (42)
- February 2013 (40)
- January 2013 (41)
- December 2012 (31)
- November 2012 (45)
- October 2012 (57)
- September 2012 (39)
- August 2012 (45)
- July 2012 (39)
- June 2012 (8)
- March 2011 (8)
- February 2011 (7)
- October 2010 (8)
- September 2010 (20)
- August 2010 (21)
- July 2010 (6)
- June 2010 (8)
- May 2010 (8)
- April 2010 (24)
- March 2010 (27)
- February 2010 (16)